February 2016 Looks

Miss Minchin look (^_^)/ because of my eye glasses… heehee

wp-1456835015393.jpg


Wakey wakey me
look… I used this when I don’t have much sleep the night before.  More on highlights, a bit of contouring but not too much, pink lips and pink blush.
wp-1456835009222.jpg

And a few Cat’s Eye look… 

… very simple look with a soft eye shadow and intense black eye liner.
wp-1456835003569.jpg
… for Glass wearers, darker eye shadow, intense black liner and red lippie. Below this is how it looks without the glasses.
wp-1456834997291.jpg

wp-1456834983850.jpg

 … with contour, made the filter lighter at the top-rightmost to show the contour on the cheek, chin, eyes and nose.

wp-1456834990049.jpg

Heart’s Day look ❤ (^_^)v
wp-1456834977484.jpg

That’s it! Didn’t base the looks from any videos. I just played around with Urban Decay’s shadow (also used for the liner), NYX Contour stick and the other items found in my February make up bag. Also, I bought a new lippie this month, as shown in the picture below (which is very striking.. and vampirish) (><,):

wp-1456834972651.jpg

For contouring, I followed Wayne Goss’ video entitled “HOW TO CONTOUR LIKE A PRO – INVISIBLE”.

Then… Where’s the review?!?!? I decided to post a separate entry on this one. Because I noticed that the January 2016 looks and reviews became to long. So, for this entry, let me just show case my experiment on the items in my February 2016 Makeup Bag.

Good night and Good morning to whichever timezone you are (^_^)/

What’s in my makeup bag: February 2016

Short but sweet…

image

.. Minion Bob approves my February Makeup Bag items ü

I am just playing around with the eyeshadow colors on my own for now but I do have to review Wayne Goss’ Contouring Tutorial so that I can use NYX Wonder Stick correctly.

Anyway, that’s it for now… Good day! I am super sleepy… [(–.)] Zzzzzzzz..

January 2016 Looks and Reviews

I had a great time trying out the looks that I got from the video suggestions in the recent What’s in my makeup bag entry. Then, also tried my own look using those beauties plus Urban Decay Naked Flushed in Naked. So, let’s get started…

The Looks

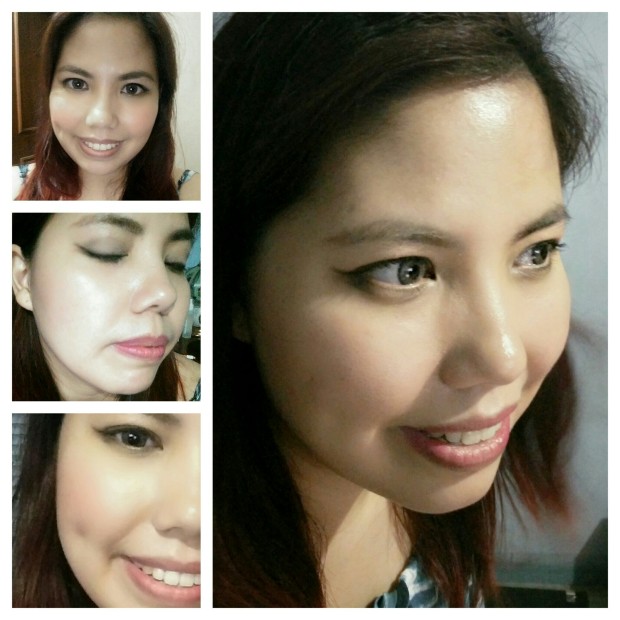
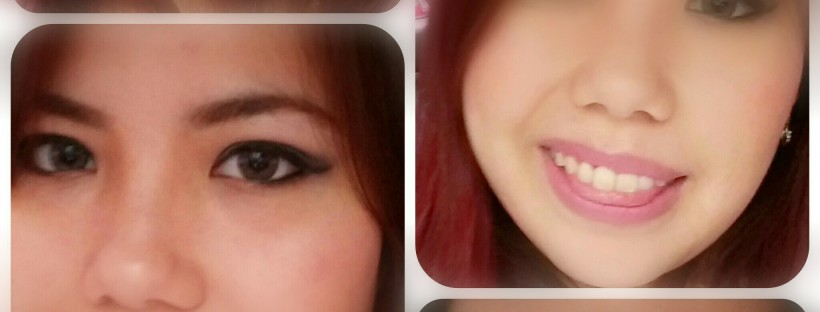
Simple Matte Cut Crease

Video Reference: Tutorial from Steph’s Beauty05
This one is the fanciest of them all.  I like the cut crease and the double cat eye liner. I won’t be providing the tutorial since it would be redundant 🙂 So, I suggest visit Steph’s Beauty05 site. I deviated a bit on the lipstick color and I used NYX soft matte lip cream in Istanbul for that pinkish matte lip (^^)/ I don’t use false lashes so the lashes are not that obvious in the picture. I just use mascara to slightly define it (since I’ve got short lashes).

SimpleMatteCutCrease.jpg


Smokey Grey Eyes

Video Reference: Tutorial from Maya Mia
This look is my favorite for this month. And it is the reason why I subscribed to Maya Mia (^_^)/ Her other videos are also great .. check it out and maybe you’ll subscribe too.SmokeyGreyEyesByMayaMia.jpg


Soft Smokey Liner and Burgundy Lips

Video Reference: Tutorial from Maya Mia
Again, I deviated on the lips. This is supposed to be burgundy but I used my gloss instead.

SoftSmokeyLiner.jpg


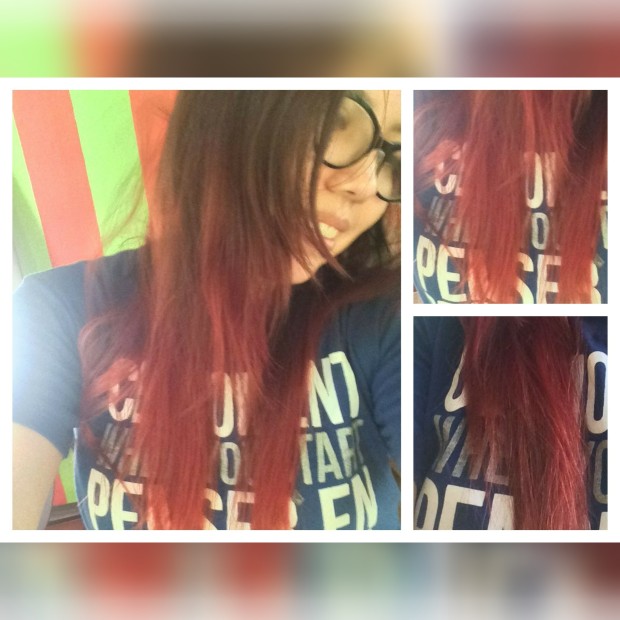
Just Rosy Cheek and Pink Lips

This is my goto look if there’s no time for eye shadow. I used Urban Decay Flushed in Naked to add an over all color to my face after applying Bare Mineral’s Powder Foundation. Then for the lips, I experimented a bit with L’Oreal’s Tint Caresse powder lipstick. I used Sakura Blossom for the middle part. For the outer corners of the lips, I used Orchid blossom. It gives the lips a hint of ombré. For the eyes, I used Urban Decay’s 24/7 Glide-on Eye Pencil in Perversion in the upper lash line. For mascara, I used Urban Decay’s CannonBall

JustRosyCheekPinkLip.jpg


Most Favorite

#1 bareMinerals’ Original Foundation, Medium beige

I’m a first time user of powder foundation and I like it. After application, it didn’t highlight the micro exfoliation happening on my left cheek which started last December. I’ve achieve light coverage with it which diminishes the slight redness around my nose. But it takes long to achieve a medium to full coverage. Thankfully, I don’t need much coverage this month. Best of all, I love the dispenser. It has this mechanism wherein you can choose how many will get dispense by adjusting how many holes are open (refer to the image below):

Top Left: 1-hole, Bottom Left: 2-holes, Right: 3-holes

#2 Nyx’s Soft Matte Lip Cream, Instanbul

One word: soft. Somehow, I feel the softness of this product while applying it on my lips (^.^). I don’t know if you know what I mean but it just feel soft plus that sweet smell.. Mmmm… it smells really really good... I really love this product and this color.

wp-1454837835218.jpg

#3 Urban Decay Naked Flushed, Naked

I like, like, like this product to achieve a natural sun kissed look. The color payoff on my skin is just enough for that healthy glow thus it is not visible on the selfies above, apologies for that. When I bought this, I was a bit worried if the bronzer would be too “orangey” for my skin but no, it was good and very blendable. It works well with the bareMinerals’ foundation I used above.

wp-1454837495098.jpg

Least Favorite

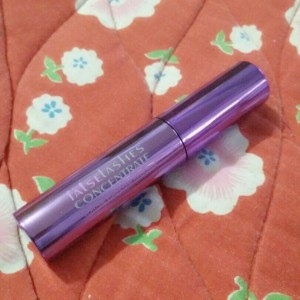
#1 Kiko False Lashes Concentrate, Volume Top Coat Mascara

It was good for the first few hours. It really volumizes my sparse lashes. But at the end of my shift or even before it, it transfers and smudges at the bottom of my eyes. Not sure if it was due to my application. But I apply it like a normal mascara. Note that I use it with the UD Cannonball mascara since it’s a top coat. Though I’ll give it a go again this month because it seems that it could be caused by my foundation or moisturizer (since they have oil in them) based on this article. I probably need to really set the foundation near the eye area to make it work. Will see…

wp-1454837939518.jpg

#2 bareMinerals’ All Over Face Color, Warmth

The color is too dark but as Shelbey mentioned you should use just a bit and then you have to blend it well. Since I got this from a set, I didn’t get to choose a lighter color. So to make it work with my skin tone, if it gets to warm/dark I blend it with a translucent powder. Lastly, the dispenser is a mess. I should have not removed the tape completely. Forgot that.. lookie here (–#)> So, I really have to be careful when using this one.

wp-1454822749944.jpg

The End.

Let me know if you’ve got any comments or tips. Also, I’m interested to know if the products mentioned here worked or didn’t worked on your end.

Have a great day or night, wherever you are (^_^)/


What’s in my makeup bag: January 2016

wp-1453304579987.jpg

In my make up bag for January, the above picture are the main products that I will use as much as possible and hopefully, give a review by end of this month via the January 2016 Looks entry.

I just bought Bare Minerals kit in Sephora from my recent trip. I’ve used it a number of times this month and so far so good. It was also lucky that I checked out the tutorial on how to use Bare Minerals mineral foundation and the kit in general prepared by Shelbey because she explained it really well and saved me from wasting the product.

Then, the come back of my old but gold TheBalm’s Meet Matt(e) Nude. For the lips, one of my recent favorite is Nyx’s Soft Matte Cream in the color Instanbul.


The following are the looks that I will try to do:


Then lastly, not make up related but a video from two Beagles, Charlie and Ollie. It can make you smile at the least. You may also end up rotfl (^_^#)>. Let’s starting smiling by clicking here and watch intently.


#RedHairProject Week 4

Due to my trip abroad (which usually means a week  before the my departure last December 13 would be fully booked (^_^#)>), I was just able to post these items today. This post will be shorter than usual since I am just using the same products and there are no new updates except for one new tool that I used for our Christmas Party last December 07. Enjoy!

Seventh Wash

Washed it a day earlier, December 08 (instead of December 09, Wednesday), since the smoke from the bar where we had the after party event got stuck on my hair when I woke up this morning. Hair looks great and has retained a bit of the curl/wave from last night. Seems like I get to extend this a bit more before my trip to Europe this Saturday (^_^)d

wp-1450471590976.jpg

All pictures above are direct sunlight but of different angle. As you can see in the lower left, sometimes it is more ginger in color (almost showing the bleached color at the latter part of the ombre section) but most of the time it is red.

Eight Wash

December 12, last wash in relation with this project. This is the last wash before the one-month expiry of the color. It seems that I was able to extend it even if the bleached color at the ombre section is starting to show. Let the picture do the talking on this section (–,)/

wp-1450471585187.jpg

New Tool: Full Size Curler from Eva NYC

Great curler. Love the different sizes I got from Eva Nyc’s 4P Interchangeable Barrel Curler Metallic Pink.

Funny Story (well for me :P): All this time I thought it was Eva Nye. Poor eyesight does that to you. The “c” on their logo looks like an “e”. While I was window shopping at Beauty Bar a few weeks ago, I even said “Eva Nye” to the sales lady. The look on her face was priceless 🙂 I don’t know if she wants to correct me or laugh at my face but no worries, she didn’t do either although I’ll appreciate it if I was corrected early on (^^,)

Anyway, I’ll provide my thoughts on this product when I’m able to use this a few more times.

Here’s the finished look using the 32mm barrel:

wp-1450472436629.jpg

It was curlier earlier in the morning but after styling it, I like how the curl softened into waves that was a match to the hairstyle that I’m using for the Office Christmas Party last December 07.

The hairstyle above is based on Kayley Melissa’s video. The video contains 7 holiday hairstyle and the one that I used is called, “Work Party”. To go straight to the “Work Party” tutorial, click here.

Products used:

Maintenance

Lafes Dry Shampoo in Red (Available in Healthy Options)
Pureology serious color care, super smooth shampoo (Available at BenchFix Salon)
Kerasilk Keratin Treatment Conditioner (Available at BenchFix Salon)
Shikai Color Reflect Shine Serum (Available at Beauty Bar shops and their online store)

Hairstyling

Proganix, Smooth acai berry + Hydra Kerstin, Flat Iron Finish + Hydration (Available in Watsons)
Alba Botanica medium hold hair spray with color protection (Available in Healthy Options)
Eva NYC’s Up All Night Volumizing Spray (Available at Beauty Bar shops and their online store)
JML Travel Pro Hair Dryer
Wimpex Active Mini Pro
Eva Nyc’s 4P Interchangeable Barrel Curler Metallic Pink


DIY: Color Switcher

I was meaning to share this with you guys a few weeks ago but just found the time today ü This nifty makeup tool has been there for a while but would like to post this on my blog so that I won’t forget. I was checking out past videos of Wayne Goss and one of it is the video on How to instantly clean your brush without washing / spray or alcohol.

It was about Vera Mona’s Color Switch. It was a cool tool but on the pricey side. Then, I thought of looking for a DIY version since it seems that it could be done so here you go…

You’ll just need 2 materials:

– Donut Bun (medium or large size)

image

– Metal Tin Can (round preferably if you want it to look like the Vera Mona’s version)

image

The we can start our mini DIY Project…

Step 1. The only step that makes sense heehee… Put the donut bun inside the round metal tin can. Ü Like this:

image

Voila… You’ve got your own version of color switch which will just cost you around 2-3 bucks. I tried it out on my brushes using violet, black, red and blue eyeshadows to test if it works… And it did… Stroking the brush on the donut bun removes the color, then you can switch to another shadow as you please. Note that this only works on powder eye shadows (^_~)/

Then, if you are done with your make up just put the lid and stow it away to your makeup bag. Like this:

image

You can also use either side of the bun. Don’t forget to clean it once a week or after every use.

Here’s the video that I found in youtube by Elessa Jade. She shows it in action as well ü Then, if you want a silly and fun take about this DIY as well click here for Viidreamcatcher’s version.

Hope you find this helpful!

Additional info:

A micro fibre would also work instead of a donut bun.

Here’s a link to the original Color Switch from Vera Mona.

What’s in my makeup bag: September 2015

image

Since I’m loving BALMSAI, it’s back from August ü Then, I’ll be trying out Makeup Factory’s Foundation and Primer.

New items in the bag are:
Nyx HD Studio Photogenic Finishing Powder
Soap&Glory Kick ass Concealer
Canmake Lighting Liquid Eyes, Lasting Multi EyeBase and Cleansing Stick
Makeup Store Crazy Lazy Eye Pencil

I’ll be trying out the following tutorials this month ü

Blue Green Eyeshadow Tutorial
Perfect Cut Crease Tutorial
Soft Smokey Purple Grey Eyeshadow Tutorial

Earlier this month, I was able to experiment with the greens of the BalmSai palette ü

image

If you’ve got some suggestions, or useful videos post it in the comment section.

DIY: Alcohol Free Brush Cleanser

A month ago, I used a DIY: Brush Cleanser with tea tree oil and alcohol to spot clean my make up brushes. Unfortunately, it dried my brush and so, I looked for another option. Fortunately, I was able to “save” the brush by deep cleaning it using the cleaning agent mentioned in my that blog entry. So now, 2 of the brushes that became a bit dry/”hard” on the skin is back to its soft texture.

Sharing this video I found on youtube by Always Lorna Marie using tea tree oil and witch hazel. You could check it out by clicking this link.

Then, I made my own version of it with just a minor twist in the end. I added a few drops of lavender (to disinfect and to balance the earthy smell of tea tree oil and the “pastry”-like smell of the witchhazel.

Here’s my recipe:

  • Witchhazel
  • Tea Tree Oil
  • Lavender Oil
  • 30ml Spray bottle
  1. Fill the bottle (~25ml)
  2. Mix in 3ml Tea Tree Oil (TTO). But this depends on how strong you want TTO be. In the video the recommendation is 1 part TTO and 2 parts Witchhazel. For a 30 ml bottle that’s 10ml TTO and 20ml Witchhazel.
  3. Mix in a few drops of Lavender Oil (since it’s a bit strong, I just mixed 2-3 drops).
  4. Shake, shake, shake everytime you use it.

wpid-1436281142903.jpg wpid-img_20150707_225426.jpg wpid-sil-bottlespray.png

If you find it useful, please feel free to share your thought in the comments section. I’ll really appreciate it (^_^)

Brush Egg

Brush Cleaning… My Zen

Last week was pretty hectic until Sunday. Not because of work (well a bit) but mostly because I was sick for a few days and feeling fatigued than usual. I’m giving it a week if I need to have myself checked again or I just need to have that good rest. Now, it is Monday and I am still unwell but I found my Zen..

Brush Cleaning

image

… to relax and hopefully, I’ll be back and ready for work tomorrow (miss doing my job a lot ü)

Youtube Links and My Thoughts

I won’t be providing a brush cleaning tutorial but will be putting some useful links below that was shared by Youtubers that I find useful and got my ideas from:

Brush Cleaning Tutorial with Brush Egg – a very useful tutorial
Brush Drying Rack – basis of my drying rack
Pixiwoo Guide to Makeup Brushes – contains some tips on cleaning brush at the end (spot cleaning or deep cleaning)

Lastly, the following will just be some items that I used in cleaning my brushes:

1. Brush Egg – This tool is very nifty and affordable. I really love it since I don’t have ‘prune fingers’ resulting from cleaning my brush. Why? Because before I used the palm of my hand to clean the bristles by swishing it gently in circular motion (as if you are blending your make-up on your palm). If you have more than 10 brushes to clean and you’re palm and fingers are soaked in water and soap… You get the gist! Going back, this is available in The Ramp, Glorietta which I happen to see (and obviously bought as well ü) while I was hauling some RealTechniques brushes (that’s a different story and not for this entry lol ü). I’ve been using this for months and really removed hard-to-clean dirt/stain from the brushes together with the cleaning agent. Here’s the picture:

image

2. Cleaning agent – My concoction of choice has these three ingredients — baby shampoo, olive oil and water. Before, I only use baby shampoo and lukewarm water for brushes then after some research, I found out that you can add olive oil that acts as conditioner of the brush. After doing it for about 3 months weekly, it really works.

3. Brush Dryer – The item shown below is a DIY brush dryer and I got an idea from some Youtubers (one of which is the link above) and sort of combined it. I bought the plastic rack from Japan Homes and the elastics from National Bookstore. I heard about brush trees but they are pretty expensive. Although, AliExpress has some similar items that is way cheaper but I didn’t opt for it since it will take 30-60 days before it gets delivered and the rush delivery fee is way expensive than the product’s price ü Without further adieu, here’s the brush dryer and some of the items that I use when prepping the clean brushes for drying:

image

4. Sanitizing Agent – The ingredients I used are water and tea tree oil. I put 10 drops of tea tree oil in a 30ml spray bottle. Then, add water. Shake. And, that’s it you have a DIY brush cleaner. But I’m still experimenting on the measurement but hopefully, it will clean and sanitize my brushes without drying it out. I’m just new on essential oils but will let you know in a month’s time if it works for spot cleaning my brush (after every use). Here’s the picture of something thay I bought from beauty bar and something that I made using water and tea tree oil (recycled a 30ml spray bottle from Juice Beauty):

image

Good night, Good day everyone! Wherever you are hope you find the links and my thoughts useful.